
How Do I Set Tie Dye Colors To Keep Patterns Bright?

October 17, 2025
8 minutes read

Tie dye brings a fun and creative twist to fabric, letting you put your own colorful stamp on it with bold hues and eye-catching patterns. The real game changer is how well those colors stay vibrant over time. When you nail the color-setting process your designs not only look sharp but also remain vibrant and clear. They stay strong enough to endure many washes without fading or bleeding.
Tie dye colors have a nasty habit of fading or bleeding if the dye hasn’t bonded with the fabric fibers. Many dyes need a proper setting process that locks in those colors with a strong grip to stop them from washing out. When the dye isn’t fixed properly, the color particles can go rogue—coming loose or fading away, or even blending together in a blurry mess that ruins your design. Plus any leftover dye that didn’t bond well can sneak onto other areas during washing, leaving your fabric dull and your pattern less sharp.
Taking a Closer Look at Tie Dye Colors and Fabric Types
Different fabrics have their own quirks when it comes to soaking up dyes. Natural fibers like cotton tend to welcome dye, resulting in colors that pop and stick around for the long haul. Meanwhile, synthetic fibers can be stubborn and often resist dye or end up with colors that feel washed out.
- Cotton: This is the go-to fabric for tie dye because it soaks up dye like a sponge resulting in bright and eye-catching colors that stick around.
- Rayon: A semi-synthetic fiber that loves to take dye and produces soft vibrant shades though it usually won’t hold color as stubbornly as cotton.
- Polyester: This one’s a bit tricky because it doesn’t work with most traditional dyes and demands special disperse dyes that often produce muted or subdued colors.
- Silk: It drinks up acid dyes beautifully creating rich glowing colors but this fabric needs to be handled with care.
- Blends: When you mix natural and synthetic fibers the dye can behave unpredictably so picking the right dyes and prepping the fabric is key.
Tie dye involves a handful of different dyes each bringing its own quirks and charm when setting those vibrant colors. Fiber reactive dyes like Procion MX are the go-to for cotton and other plant fibers because when treated right with soda ash they pop with bright and lasting hues that don’t fade easily. Acid dyes work mostly on protein fibers like silk and wool. They need a bit of heat and a touch of acidity to lock in the color. Disperse dyes target synthetic fabrics but usually don’t deliver colors as vivid as the others.
Getting Your Fabric Ready for Vibrant Tie Dye Designs that Pop
Getting fabric ready is absolutely key to nailing those bright, eye-catching tie dye colors. A good wash helps strip away any oils or sizing that might otherwise play party pooper and keep the dye from soaking in properly. Next up, soaking the fabric in a mordant like soda ash really does wonders—it gives the fibers a better grip on the dye.
1
Give your chosen fabric a good wash with a mild detergent. This helps shake off any lingering dirt or oils that might interfere.
2
Mix yourself a soaking bath using soda ash (sodium carbonate) according to the package instructions. This is the secret to raising the fabric's alkalinity and prepping it to absorb the dye effectively.
3
Let the freshly cleaned fabric soak in the soda ash solution for about 15 to 30 minutes. This allows it to take in all the goodness and get ready for vibrant color.
4
Once soaked, gently wring out the extra solution but avoid twisting it like a wet towel. Then fold or bind it however you like to create your signature tie dye patterns.
How to Apply Tie Dye Colors to Keep Those Patterns Bright and Lively
Applying dye with a bit of care really goes a long way in keeping those tie dye patterns vibrant and crisp. It’s a good idea to steer clear of too much overlap between colors and to use precise tools—think fine brushes or squeeze bottles—to keep bleeding and muddiness to a minimum.
- Use squeeze bottles to place dye with pinpoint precision so you can focus on specific fabric areas without any fuss.
- Skip the brushes on big surfaces unless you are aiming for a lovely blend because brushes tend to wander beyond where you would really like like an overenthusiastic artist.
- Choose your colors carefully whether you are going for complementary hues or bold contrasts to avoid that dreaded muddy mix when they come together.
- Apply dye gently with a light touch to prevent the mess of over-saturation that causes bleeding and dull lifeless colors.
- Leave some white space in your patterns. It is like giving your design a little room to breathe and keeping things bright and lively.
- Take your time and proceed patiently by adding one color at a time. This helps maintain crisp edges and smooth, well-defined transitions. It pays off in the end.
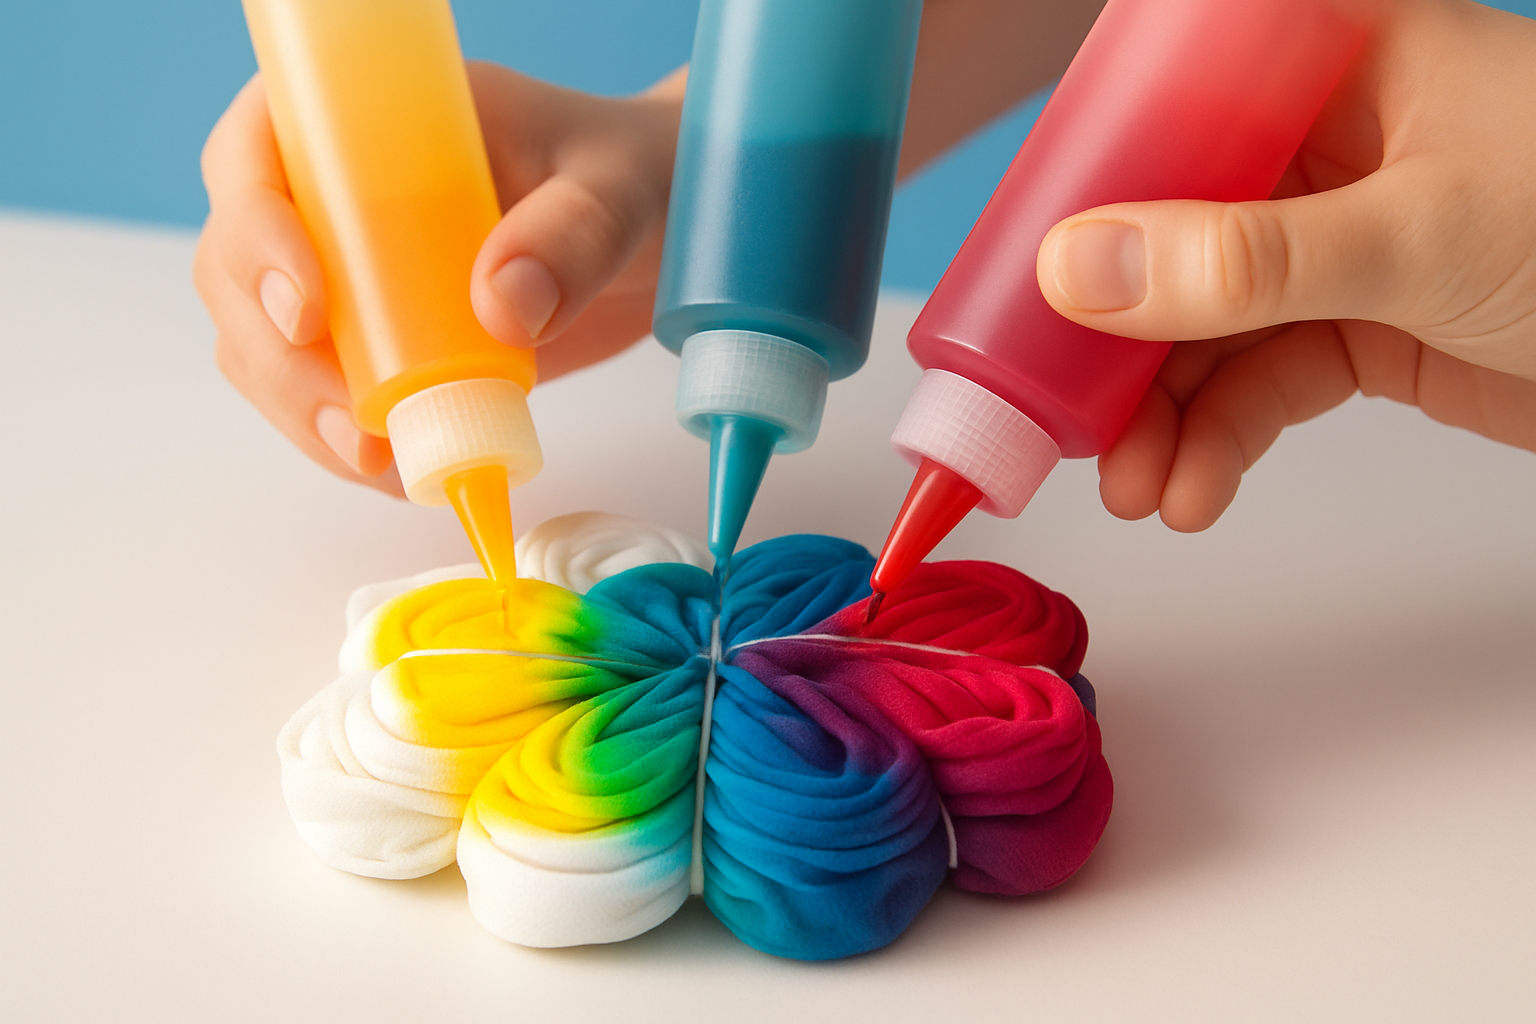
Applying bright tie dye colors precisely using squeeze bottles to maintain clean and vibrant pattern edges
How Can I Set Tie Dye Colors? Your Handy Step-by-Step Guide to Locking in Those Vibrant Shades
Really make those tie dye colors pop by letting the dye fully sink into the fabric fibers first. Then give the fabric a gentle rinse to wash away any extra dye that might be hanging around. Follow with a careful wash and dry it just right.
1
After applying the dye wrap your fabric snugly in plastic to keep it damp. Then let it rest at room temperature for 6 to 24 hours. This gives the dye plenty of time to set in.
2
Gently rinse under cold running water to wash away excess dye without causing it to run.
3
Next switch to warm water and keep rinsing until the water runs mostly clear. Patience here really pays off.
4
Give the fabric a good wash using a mild color-safe detergent. You can do it by hand or on a gentle machine cycle.
5
Avoid harsh detergents and bleach because they strip the dye off.
6
Air drying is best but if you’re in a hurry use a dryer on a low or no-heat setting. This helps keep the colors from fading due to heat.
Heat setting or curing your tie dye usually does wonders for colorfastness and helps the dye cling to the fabric as it is meant to. You can do this by steaming, ironing on low heat or giving it a quick spin in the dryer's warm setting.
Common Slip-Ups That Can Drain the Life Out of Your Tie Dye Colors and How to Keep Them Vibrant
- Washing fabric before the dye has fully settled often causes bright colors to fade too fast.
- Leaving fabric soaking in dye or mordant for hours can turn vibrant hues into a messy color bleed—definitely not the look you want.
- Mixing dyes that don’t play nicely together usually creates patterns that look muddy or lifeless like a bad paint mix.
- Skipping important prep steps like treating fabric with soda ash weakens the dye’s grip and means your colors won’t last as long as hoped.
- Tossing your tie-dyed treasures into the wash with harsh detergents or bleach quickly strips color and ruins your patterns.
If your tie dye looks a bit faded or dull the first step is to take a good hard look at your setting and washing techniques. Then tweak what needs tweaking for next time around. To revive those colors you could give the fabric another soak in a dye bath or carefully dab on some color brightening treatments.
How to Keep Your Tie Dye Vibrant Over Time (Without It Losing Its Mojo)
Taking good care of your tie dye once it is all dyed up is absolutely key if you want to keep those colors popping like the day you made it. I’ve found that washing it inside out with cold water really does the trick at cutting down on wear and fading—kind of like giving your shirt a little chill time. Avoiding heat when washing and drying is a smart move because heat can ruin those bright hues.
- Turn tie dye garments inside out before washing to give those vibrant colors a fighting chance against the washing machine’s hustle.
- Wash with cold water to keep the dye looking fresh and lively while cutting down on any bleeding drama.
- Opt for gentle, color-safe detergents that play nice with your dyes instead of stealing their spotlight.
- Whenever possible, let your items air dry or use a low heat setting in the dryer to avoid that dreaded fading and shrinkage heat tends to bring along.
Camden Sterling
21 articles published