
How To Make An Iron Nail Ring At Home?

October 5, 2025
8 minutes read
An iron nail ring is a bold, offbeat accessory that grabs attention by blending a rugged industrial vibe with personal flair. Whipping one up at home can be surprisingly rewarding and lets you create a unique piece that reflects your style and personality. This is more than making a strong fashion statement—it lets you transform humble materials into wearable art while sharpening basic metalworking skills.
An iron nail ring is a charming handmade piece crafted by bending and shaping a solid iron nail into a circle that fits the finger snugly. Designs often embrace the nail's raw industrial vibe and usually leave the head and pointed tip in plain sight to add personality. Iron nails have become a favorite in the DIY jewelry world because their sturdy metal holds its shape, they won’t break the bank and their rugged style pairs easily with everything from edgy to rustic looks.
Materials and Tools You will Need to Whip Up an Iron Nail Ring
When you decide to craft your own iron nail ring, it’s smart to gather all your materials and tools in advance. This prep work keeps the process flowing nicely and helps you stay safe because handling metal isn’t a walk in the park.
- Iron nail: Grab a medium-length sturdy iron nail that is free of rust because nobody wants a ring that is just a fancy tetanus risk. The size depends on the width of the ring you’re aiming for and your finger size. It’s a bit like Goldilocks — gotta find the one that’s just right.
- Hammer: A small ball-peen or claw hammer will be your trusty sidekick here, perfect for shaping and flattening parts of the nail without going overboard.
- Pliers: Needle-nose pliers are your best bet when it comes to bending and curving the nail with precision. Think of them like the artist’s brush for metal.
- Metal file: A must-have for smoothing sharp edges and refining the shape after you’ve bent things into place. Safety first and polished rings second.
- Sandpaper: Aim for something between medium and fine grit, roughly 220 to 400, to polish the surfaces and tame rough spots. It’s the finishing touch that makes your handmade ring feel just right.
- Protective gloves: Throw these on to guard your hands from sharp edges and any heat if you decide to get fancy and apply some.
- Measuring tape or ring sizer: These little tools will save you from the classic ‘too tight’ or ‘about to fly off’ disasters by giving you a spot-on measurement for a comfy fit.
Important Safety Tips for Handling Metal Tools and Iron Nails
Handling metal tools and iron nails might seem straightforward, but a bit of caution can save you from unnecessary headaches and probably a few scrapes too. Whether you are a seasoned pro or just dabbling in a DIY project, keeping safety front and center is always a smart move.
Crafting your own iron nail ring involves bending the metal by hand and sometimes applying heat. Both can be a bit tricky if you are not careful. It is a good idea to always wear protective gloves to shield yourself from those pesky sharp edges and tiny sneaky metal shards. When heat is involved, make sure you’re working in a well-ventilated spot and keep a fire extinguisher close by. Take it slow when bending the metal because rushing might cause it to snap unexpectedly.
A Simple Guide to Crafting an Iron Nail Ring at Home That'll Make You Proud
Turning a simple iron nail into a ring takes a bit of patience and some careful shaping, done step by step so it fits just right and actually looks good.
1
Choose the right iron nail and get it ready: Hunt down a nail about 2 to 3 inches long, making sure its shaft is thick enough to suit your ring idea. If it’s looking a bit rusty or greasy—as nails often do—give it a good once-over with a wire brush or let it take a vinegar bath to clean up its act.
2
- Measure your finger to find the ring size: Grab a ring sizer or a measuring tape and wrap it around your finger to find the perfect circumference. Then, mark the nail where it’s meant to bend—think of it as your DIY blueprint.
4
- Slowly bend the nail into a ring shape: Using pliers, start coaxing that nail into a curve. Take your time here, moving carefully so you don’t end up with a cracked or warped piece of metal—patience pays off!
6
- Check the fit and adjust for comfort: Slip the ring on frequently and see how it feels. Make gentle tweaks to the curve here and there, aiming for comfort without messing with the overall shape. You want something snug but friendly.
8
- Smooth out any rough edges with a file and sandpaper: File away any sharp bits near the ends—because ouch is no fun—then sand the entire ring down to smooth out burrs and give it a soft, wearable finish.
10
- Optional: use heat to help shaping or strengthen: If you’ve got a small torch handy, a little gentle heat can do wonders. It softens the metal, making it easier to shape without fear of cracking—just don’t get too carried away.
12
- Finish with design details and polish for a nice look: Add any special flourishes or personal touches you like, then give your ring a good polish using metal polish or fine sandpaper to really make that iron shine. A little sparkle goes a long way!
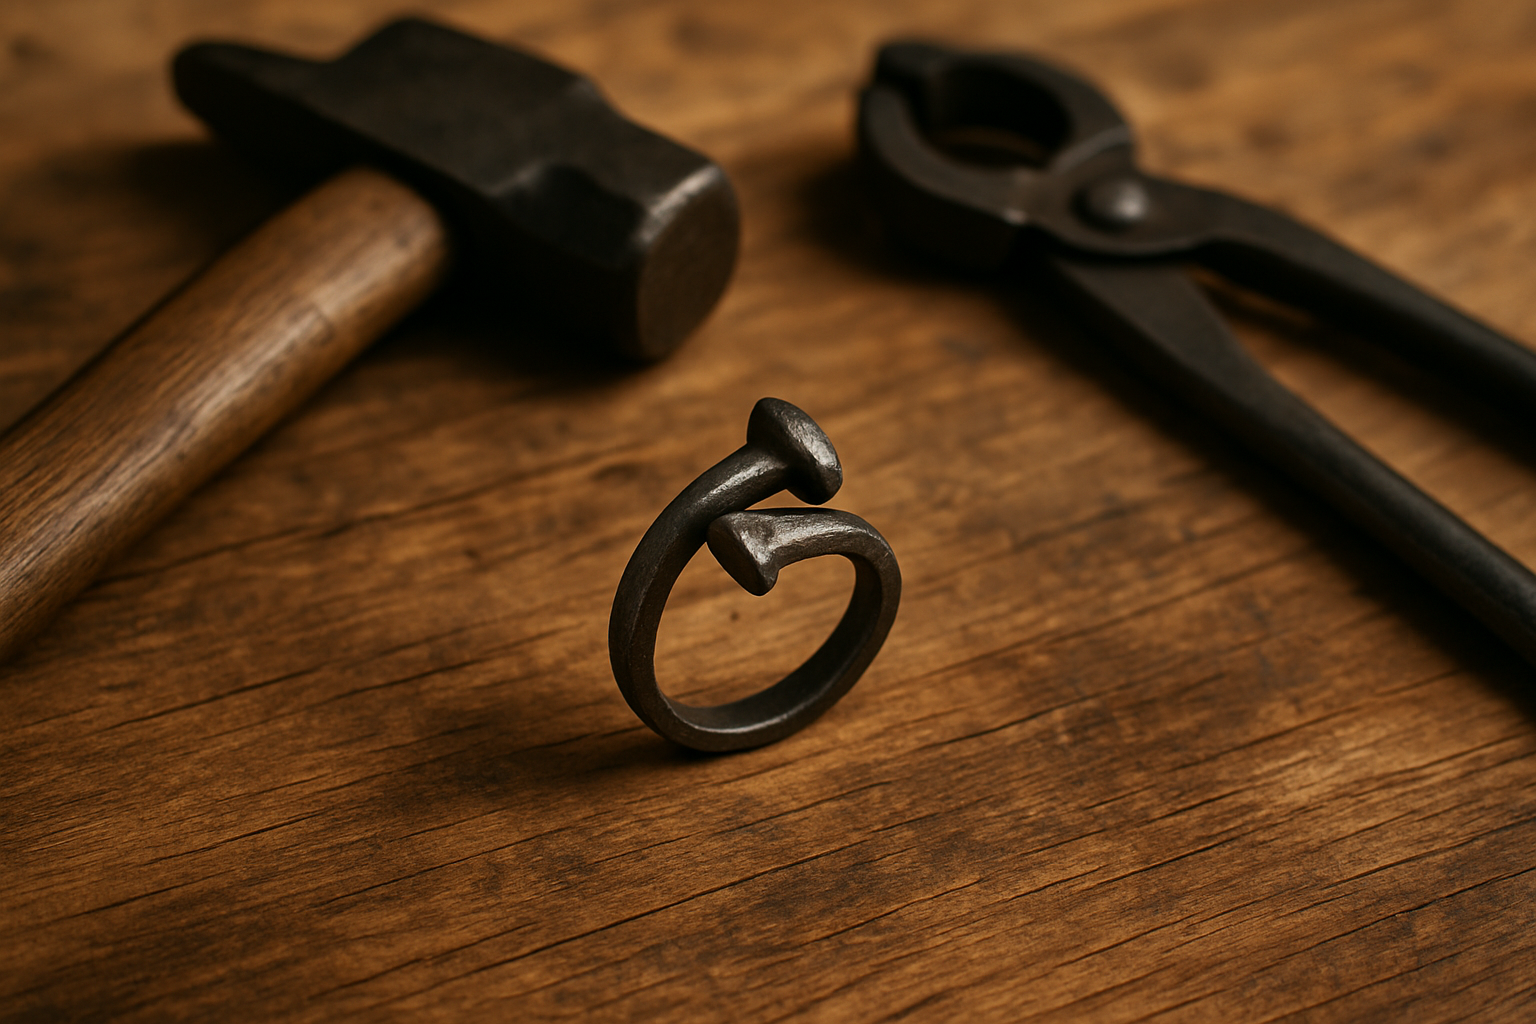
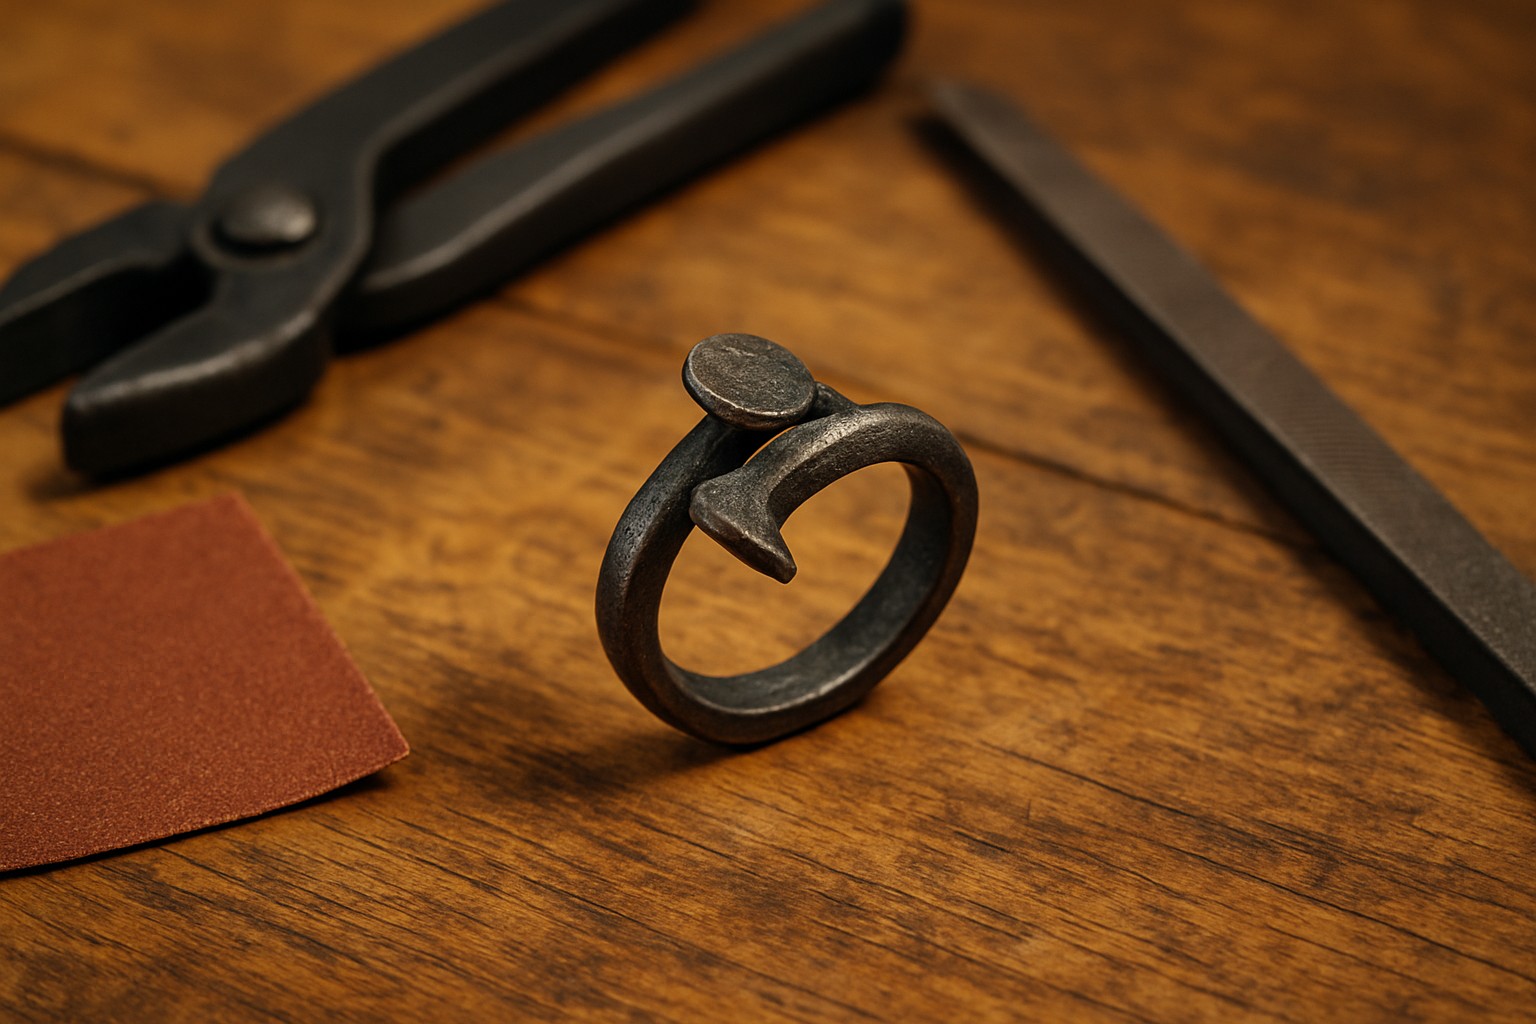
A handcrafted iron nail ring resting on a wooden surface with crafting tools nearby, illustrating the DIY jewelry process.
Handy Tips to Make Your Iron Nail Ring Truly Your Own
Once you have whipped up the basic ring, you can totally make it your own by adding some personality or that little extra flair.
- Intentionally apply a rust patina to give the piece a charming vintage vibe and then seal it with a clear coat to prevent rust.
- Wrap parts of the ring with thin wire or leather strips to add texture and a touch of visual flair.
- Add a bit of hammer texture by gently tapping the surface with various hammer heads. This creates a finish that can be masculine or feminine depending on your mood.
- Carefully nestle small gemstones, beads or enamel dots onto the ring to add a delicate sparkle without overdoing it.
- Play around with nails of different shapes, head sizes or metals like stainless steel to mix up the design styles in fun ways.
Typical Challenges and How to Tackle Them Head-On
Making an iron nail ring is pretty straightforward but beginners often struggle with bending the metal just right without cracking it. They also have trouble getting a perfect fit, smoothing sharp edges, and preventing rust. Knowing these common issues and a few tricks upfront can make your DIY project run smoother.
- Iron tends to be brittle so it’s a good idea to warm the metal gently before bending it sharply. This small step can save you a lot of trouble by preventing cracks or breaks.
- Take your time measuring your finger and don’t hesitate to add a bit of wiggle room because comfort is key when it comes to a ring you’ll want to wear all day long.
- Grab a metal file and some fine sandpaper to carefully smooth out those sharp edges. Your fingers will thank you.
- To keep your finished ring looking sharp and rust-free, make it a habit to apply sealants or polish it now and then with products designed to fight off corrosion.
How to Care for Your Iron Nail Ring to Keep It Looking Sharp and Last a Lifetime
To keep your iron nail ring looking sharp and ready to impress for years on end, it definitely needs a little tender loving care. An iron nail ring has this pesky habit of rusting and tarnishing if you just let it sit around neglected.
- Try to avoid prolonged exposure to moisture like swimming or heavy sweating because that can cause rust to form.
- Every now and then, apply an anti-rust coating or a clear sealant to keep the metal surface looking sharp and protected.
- Gently wipe the ring with a dry or slightly damp soft cloth to remove dirt and oils without causing scratches.
- When the ring is off your finger, store it in a dry place such as a jewelry box or pouch to limit its exposure to air.
- Reapply protective finishes or polish whenever you feel like it; this helps keep the ring looking fresh and makes it last longer with everyday wear.
Tobias Wilde
26 articles published